Saturday, January 31, 2009

Comment Winner

We had a fabby workshop today. It was the Year Ahead book, which is a gate fold flag book, made from scratch with chipboard pages. Everyone had a great time despite sticking things upside down and back to front!!! The lovely Anne and Jane brought plenty of chocolate ready for the after dinner sugar lull and that seemed to do the trick. The class was really full as it sold out ages ago, so will be repeated in the next brochure for those of you who have missed out. Quite a few of the classes have sold out and the next class with available places is Kirsty's on Sunday 8th February. She is launching her fabby new product on that day so be sure not to miss out!!


Talking of workshops - I will be holding Breakfast workshops at The Great Northern Papercrafts Extravaganza 28th / 29th March in Harrogate. The workshops are held before the show opens and cost £10. £3 when booking and £7 on the day. All materials and breakfast are included in the price.


Here's details of my workshop


Tags that Shimmer n Shine
Tutor: Dyan Reaveley
Today you will be learning a stunning faux bleached ink background. We will then be adding Shimmer and Shine with the beautiful Blonde Moments Pearl Pigments to create tags that will stun and amaze!


Details of all the other workshops and booking information can be found HERE.


Just remembered I never posted the winner of The Comment.


Well here we go angie's blogspot said...


thankyou Dyan for taking the time out of your extremely busy life to share your fab tutorials with us, I actually made a card using your papers and pearls, but it was a last minute card for my friend and didn't get chance to photograph it. thanks again xx
January 24, 2009 5:28 AM


Congratulations Angie. You need to send me your address and then we can post everything out to you.


This is what you've won


Enjoy!!

OK I am off to prepare tomorrows Beginners Art Journals workshop. As you know one of my faves. Ooh they are in for such a messy treat. xx
Wednesday, January 28, 2009

Odds and Sods

The 5 fold screen workshop went like a dream today and a good time was had by all. The ladies were the quietest class I think I have ever taught , far too engrossed in their work for chit chat. lol. I think they were panicking a bit about finishing it as it did have a lot of detail in it!!
As usual some followed my example to the letter whilst others just did their own thing. I always say its up to you which approach you take as it is your project after all.

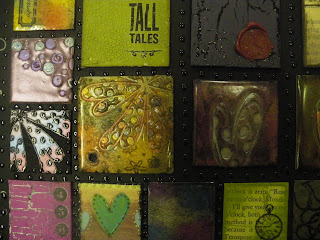
In one of my redundant moments I started sorting through one of the cubby holes near one of my many work areas. I came across lots of sample squares. These are all made when I am demonstrating techniques and those I don't use to decorate my many mirrors and journal covers are thrown into bags ready to use another day. Well today was that other day. I thought I would make a new board for the studio wall. So I faux mosaiced them onto a large piece of mount board ready to hang. I am really pleased with it and think it will look stunning hanging on the wall. Just goes to show what you can make with leftover odds and sods, doesn't it?


Tuesday, January 27, 2009

Tomorrows screen workshop

Thought I would show you the screen workshop taking place tomorrow. This class sold out straight away at preview weekend. It is decorated using the Savannah papers from 7gypsies. These papers are their first double sided collection and are absolutely gorgeous. Their earthy tones seem to go with any subject matter.

I have decorated this screen with photos from Emmi's 21st birthday. I am still surprised that my baby has grown up into such a beautiful young woman . You turn around, you blink and there they are all grown up!! One of the seven wonders of the world??


I just lurve this photo of her.


Emmi hasn't seen it yet so cant wait to show her it tomorrow. Fingers crossed she loves it

Sunday, January 25, 2009

January Journals

Fabby Dabby day today. It was journal class, one of my faves. It was the first journal class this year and I knew everyone would need a little help getting started again, so we decorated the inside covers with tags ,stamps,grungeboard and chipboard letters. It always amazes me that when given the same materials they all turn out differently. Here's a few examples.


Heres some of the finished covers, beaut aren't they??
Here's a few snips of some more of mine.

We had a special guest tutor take part of the lesson today lol

As you can see the students were extremely attentive.
Here's Maisie's journal page that she was demonstrating.

And she even joined in shoe watch!!

Maybe she could be persuaded to do some guest blogging for me. haha.

Friday, January 23, 2009

Pearl Tutorial Day 6

Yayy!! Welcome to the last of the 6 Pearl Tutorials. Please leave a comment to be in with the chance of winning a bundle of Blonde Moment Goodies.

You will need one of the prepared backgrounds that we made on day 1. If you missed it you will find the instructions HERE.

Materials used

Blonde Moments

Pearl pigments - Sugar Floss, Festive Copper, Spring Orange, Sugar Pink
Stamps - A Little Bit of This, Just plain Stripy, Sweet somethings, Bordering on Love
Clear embossing powder
Spritzer bottle
Ribbon
Princess brad
Diamantes

Ranger

Spiced Marmalade Distress ink pad
Raspberry Adirondack ink pad
Carnation Archival ink pad
Black perfect medium Pad
Heat resistant mat
White Opaque Gel pen
Star Dust Stickles
Glossy accents
Cut n Dry Foam


Method

Step 1. Ink up the flower background stamp ( A Little Bit of This), with Carnation Archival ink and stamp onto prepared background.

Step 2. Ink up the stripy stalk stamp (Just Plain Stripy) and stamp onto the background.

Step 3. Faux stitch around the edge with the Opaque white pen.

Step 4. Add decorative accents with the Opaque white pen.

Step 5. Ink the edges with the Raspberry Adirondack ink.

Step 6. Ink up the stripy flower stamp (Just Plain Stripy) with Black perfect Medium and stamp onto white card. Sprinkle with blonde Moments clear embossing powder.

Step 7. Heat emboss the image.

Step 8. Dip a wet paintbrush into the Blonde Moments Pearl Pigments.

Step 9. Mix on the heat resistant mat to a creamy paint.

Step 10. Paint in the image. Repeat with the other colours of pearl Pigments.

Step 11. Cut out the image leaving a small border.

Step 12. mount onto orange card and trim leaving a small border.

Step 13. Add a Princess brad through the centre of the flower.

Step 14. Mount the flower onto the Atc.

Step 15. Add decorative accents with the Star Dust Stickles.

To make the card.
Step 1 . Ink up the border stamp (Bordering on Love) with Spiced Marmalade Distress ink and stamp across the bottom of the card.

Step 2. Re stamp the border butting it up to the previous border.
Step 3. Re stamp one more time

Step 4. Ink up the quote stamp (Sweet Celebrations) with Carnation Archival ink and stamp up the side of the card.

Step 5. Add the Atc to the card, and ink all the edges with Raspberry Adirondack ink.

Step 6. Add the diamantes with a tiny spot of Glossy Accents along the border.

The finished card.

Two other colourways
Raspberry and Teal

Teal and Orange

And that's it all 6 tutorials done. I hope you enjoyed the samples and that they have given you lots of inspiration.
To win a bundle of Blonde Moments goodies please leave a comment.

Quote of the Century


"You are an extraordinary woman.


How can you expect anything ordinary to happen to you"


Louisa May Alcott